Table of contents
Painting a wooden door is a great way to renew the look of your home and make it more interesting. Much cheaper than buying a new one, transforming your wooden door still allows you to leave everything the way you dreamed of. What could be better? See what materials are needed and how to paint a wooden door:
Materials required to paint a wooden door
First of all it is of great importance that you have all the necessary materials for the painting at your disposal. This way you guarantee the best possible result and don't run the risk of having to leave the project half done, or rush out to buy something that is missing. Check out the materials:
- Newsprint, cardboard, or plastic (for protection);
- Protective mask;
- Sandpaper for wood;
- Screwdriver;
- Crepe tape;
- Wood filler or wax (for doors that need repair);
- Spatula (for applying wood putty or wax);
- Leveling primer for wood;
- Paint for wood painting;
- Paintbrushes;
- Roll;
- Ink tray.
Do you have all the materials you need to make your wooden door look like new? Then it's time to learn how to do it step by step!
Step by step how to paint wooden door
It may seem like a complicated process, but following the steps below, with the right materials and patience between processes, your door will be a success! Here's how:
Preparing the door
Before anything else, use the screwdriver to remove from the wall everything that will not be painted, such as the doorknob, lock, and hinges. If you prefer, you can protect these parts with crepe tape.
Sandpaper
The process of sanding the wood is indispensable for new doors or ones that have been painted before, because it guarantees that the wood surface will be smooth and adherent to the products that will be used.
For doors that have already been painted, prefer a coarser sandpaper. This will make it easier to remove the old paint or varnish. Don't forget to wear a protective mask, because this process produces a lot of dust that can be harmful when inhaled.
See_also: 80 types of flowers to decorate your home or gardenDon't forget to sand the sides of the door and the doorframe, in case it is also going to be painted. After sanding everything, wipe the entire door with a damp cloth and water to remove all the dust. Let it dry naturally.
Correcting imperfections
Does your door have flaws, unevenness, or missing parts? If this is the case, use wood filler or wood wax to correct these imperfections. Apply the product to the necessary areas with the help of a spatula, leaving the area as smooth as possible, and let it dry.
With the corrections dry, use a fine sandpaper to ensure the finish on the worked areas. Make sure everything is level!
Passing the background leveler
First cover the area you are working on to avoid possible splashes and dirt. Then, apply the leveling primer according to the instructions for use on the packaging. This product ensures a higher quality for painting and reduces the use of paint.
Let it dry. After the drying period, sand delicately with fine sandpaper to avoid product excesses on the piece. Remove the dust with the help of a damp cloth.
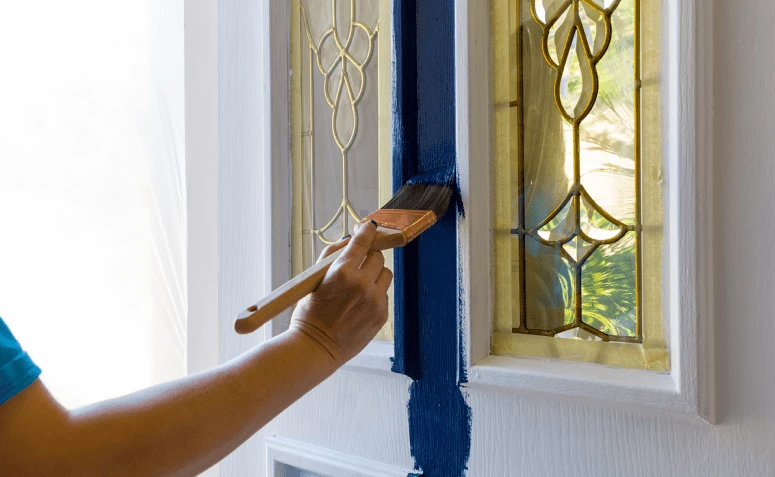
Painting
The dissolution of the product depends on the type of paint chosen, which is why it is so important that you follow these directions carefully.
The paintbrush is very useful for details and small areas, while the roller is ideal for larger areas of the door. Always paint in the same direction to ensure uniform coloring.
Do the first coat of paint and wait for it to dry. After drying, is the coverage or color still not what you want? Do another coat, and so on, until you get the desired effect. Ah, don't forget the door jamb! It makes all the difference in the finish of your new door, and deserves a little paint too. Use crepe tape around the jamb to protect the paint on the wall.Let it dry completely.
Final details
With the paint dry you can put the door back on the jamb if you have chosen to remove it. Screw back all the elements that you removed from the door at the beginning of the project. If you have kept the door on the jamb, remove the tape from the unpainted parts and from around the jamb.
Repeat the process on all the doors you want, always paying attention to the choice of paint. Doors that face outside areas need a more resistant and waterproof paint.
Want more tips and ideas on how to paint a wooden door? Check it out:
More information on how to paint a wooden door
Need some different ideas, or want some specific type of painting? Then check out the videos we have selected that teach you how to paint using anything from simple varnish to spray paint.
How to paint a wooden door white
Are you tired of the look of a door in your house? Then follow the step-by-step transformation of a simple wooden door with varnish into a beautiful white door, made by the channel Casa Cobre.
How to paint wooden door with spray
It is not an indispensable piece of equipment, as you can see from our step-by-step above, but the sprayer can be of great help when painting your door. This video from the De Apê Novo channel shows you how simple and fast the process is.
How to paint wooden door with varnish
For those who prefer a more rustic wooden door, this video by Ivair Puerta is perfect! In it you will learn how to prepare and paint a wooden door with varnish and a perfect finish.
How to renovate doors at a low cost
Have you ever thought of using Paraná paper to renovate a door? That's what Fabianno Oliveira did, and got an amazing finish! Follow the step-by-step video to see the magic happen.
Now you know everything you need to transform any room in your home with a beautiful new door! Take a moment to learn more about the different types of wood paint and ensure the success of your project.
See_also: Customize the decoration of your rooms with 3D plaster panels