Table of contents
Chocolate is incomparable and pleases everyone easily, and many delicious desserts and sweets can be made with it. However, for the preparation of many of these delicious treats it is necessary to learn how to melt chocolate.
This process may seem simple, but it is necessary to pay attention and follow some precautions to achieve a delicious and shiny chocolate.
How to melt chocolate in a water bath
- Divide the desired amount of chocolate into small pieces;
- Choose a glass, stainless steel, or ceramic container to place the chocolate chips in and a slightly larger pan to fit under the bowl;
- Fill the pan with a little water and bring it to the boil. As soon as the water starts to bubble and before it boils, turn it off;
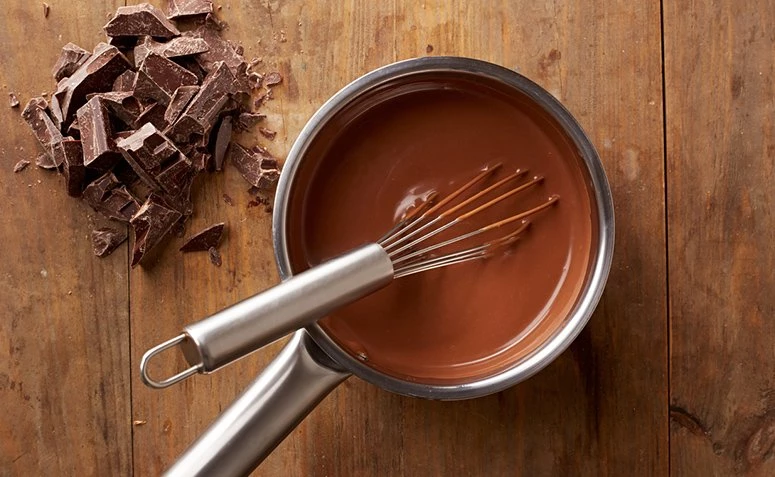
- Place the bowl with the chocolate chips on top, without letting it touch the water, and with a very dry spoon, stir constantly until it is completely melted.
To learn more, check out the following video for a step-by-step demonstration:
Chocolate can never be melted directly over the fire, hence the need for a water bath. Although simple, this technique requires attention and care not to let the water splash onto the chocolate at any stage. You can use it to melt chocolate for molding shapes, making bonbons, truffles, and other candies.
See_also: Astromelia: How to care for and 60 decorations with this beautiful flowerHow to melt chocolate in the microwave
- With a knife, cut the chocolate into small pieces and place the desired amount in a microwave safe container;
- Place in the microwave and program for 30 seconds, then remove the bowl and stir with a spoon;
- Return the chocolate to the microwave and program for another 30 seconds. Remove again and stir some more;
- If there are still pieces left, repeat the procedure, always programming every 30 seconds, until the chocolate is completely melted.
To have no doubts about the procedure and execute it perfectly, check out a tutorial of this technique:
This is a quick and convenient way to melt chocolate. However, the melting time will depend on the amount of chocolate you want to melt. Also remember that the microwave should be set in stages. You can use this chocolate for candies and toppings.
How to melt and temper chocolate
- Cut the chocolate into shavings and put them in a bowl;
- To melt the chocolate, you can use the bain-marie or the microwave. Choose whichever you prefer;
- Soon after melting, start tempering. To do this, pour the melted chocolate over a granite or marble stone and move it with a spatula until it reaches the right temperature and a homogeneous appearance. Or use the reverse water bath technique: place a bowl of cold water under the chocolate bowl and stir until it cools.
Learn more with the following video on how to melt chocolate and discover two techniques for tempering:
The techniques taught are simple and you can choose the option that you find easiest, both to melt the chocolate and to temper it, so you can use the chocolate to make Easter eggs and to cover sweets and chocolates.
How to melt chocolate for frosting
- Chop the chocolate into small pieces and place in a plastic container;
- Microwave for 30 seconds, remove and stir;
- Microwave again for another 30 seconds, remove and stir again;
- Microwave a third time, also for 30 seconds, remove and stir to finish melting the chocolate completely.
Watch this step by step video and check out important tips to ensure a shiny, smudge-free coating:
The chocolate for coverage or fractionated contains a higher amount of fat and is more heat resistant. Its use is simpler, since it does not need to go through the tempering process after melting. With this chocolate you will be successful in the production of honeycakes, cakes, bonbons, Easter eggs and small decorative details.
How to melt chocolate with heavy cream
- Make shavings of the desired amount of chocolate and place in a container;
- Add half a tablespoon of margarine or butter;
- Take it to the microwave to melt in stages or, if you prefer, use the bain-marie;
- After the chocolate is completely melted, add a box of heavy cream and mix well.
Check out this step by step video and see how to increase your recipes:
Simply and easily, you can melt chocolate with cream and use it for toppings and fillings for pies, cakes, and cupcakes. The addition of butter will add a special shine to your desserts.
How to melt white chocolate
- Cut the white chocolate into small pieces and place in a very dry bowl;
- Microwave for 15 seconds, remove and stir well;
- Repeat the previous procedure, remove from the microwave, and finish melting by stirring with a spatula.
Watch this step by step video and learn how to get it right to melt white chocolate:
Because it has more fat, white chocolate is more sensitive, so its melting time is shorter and requires special attention. By following these tips, you will be able to melt white chocolate to make amazing toppings, cakes, and other desserts.
How to melt chocolate for fondue
- Chop 300g semi-sweet chocolate into small pieces;
- Put it in a bowl that fits perfectly in a pan for the water bath;
- Heat up the water and then stir in the chocolate with a spatula until it is smooth;
- After the chocolate is completely melted, add a can of heavy cream without serum and mix well;
- If desired, finish with a shot of brandy and pour into a fondue pot.
Check out the tutorial below and learn how to prepare this delicious and romantic recipe for cold nights:
Enjoy this wonderful delicacy, with a very easy and quick way to melt chocolate. You can add a special touch with essences, liqueurs or cognacs. Chop your favorite fruits and enjoy.
How to melt chocolate in a water bath with heavy cream
- Cut off the desired amount of chocolate or use chocolate drops;
- Bring a saucepan to a boil with the bottom of the water and place a smaller container with the chocolate on top. Stir until completely melted;
- Once the chocolate is melted, remove from the water bath and add the heavy cream. Mix well to make it homogeneous and you're done!
See precious tips and check out this simple step by step in the following video:
Also known as ganache, chocolate with cream can be used for toppings and fillings for pies, truffles, and cakes. A simple and easy recipe to make, but one that will make your desserts much more delicious.
How to melt chocolate for Easter eggs
- Chop the desired amount of milk chocolate and divide it into three parts;
- Chop the remaining 1/3 very finely and set aside;
- Microwave the bowl with 2/3 of the chocolate for 30 seconds, remove and stir. Repeat the process until all the chocolate is melted;
- Then add the remaining 1/3 to the already melted chocolate and stir well until you feel the cold chocolate, you can put some on your wrist or under your lip to feel the temperature;
- Pour into an egg-shaped mold and refrigerate for 20 minutes or until opaque. Unmold and enjoy.
Check out the video on how to make an amazing and delicious Easter Egg:
This is a simple way that is indicated for those who do not have much practice with tempering and want to make Easter eggs at home. You can also create delicious fillings to eat by spoon. Surprise and delight your family and friends with Easter eggs made by you.
See_also: Slate: much more than just a gray stoneHow to melt chocolate drops
- Put the desired amount of chocolate drops into a container;
- Microwave on medium power for 1 minute;
- Remove and stir the chocolate well to make it homogeneous.
See how to use chocolate drops to make your own candies with this step by step guide:
Chocolate drops are more practical than bars, because they don't need to be chopped. Besides, because they are small, they melt faster and are ideal for those who want to gain time in the production and preparation of sweets.
Either way, chocolate makes for irresistible desserts and with all these tutorials and tips to help you, it's much simpler to prepare many amazing treats. Choose the technique you prefer and enjoy making delicious, mouth-watering recipes!